
Nudo de muestra de Paracord
3 Paracord Knotting Sites You Don't Want to Miss!
We have selected our favourite Paracord knotting sites for your paracord projects. Do you have more suggestions? Let us know!
https://www.fusionknots.com
http://www.instructables.com
http://www.animatedknots.com
Paracord Tips & Tricks
We often receive questions regarding knotting techniques and we gladly share our favorite paracord knotting techniques and patterns with you. Every week we post new instruction videos, PDF downloads or paracord ideas:
Facebook
Instagram
YouTube
An example Knot
(King Cobra Paracord)

- Materials: 2 x 2.5 meters of paracord 1 x closure 1 x lighter
- Bracelet size: Measure your wrist circumference and add 4 cm. This will be the total length of the bracelet.
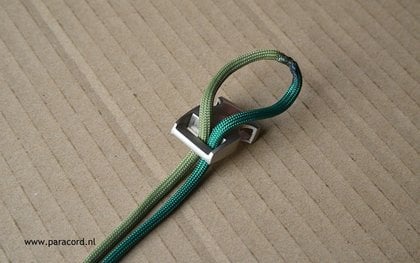
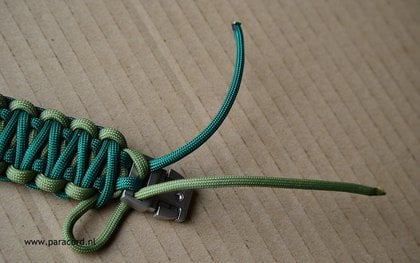
Step 1: Create a loop at the melting point. Insert the loop through the bottom through the female.
Step 2: Bring the female through the loop. Fasten the loop tightly.
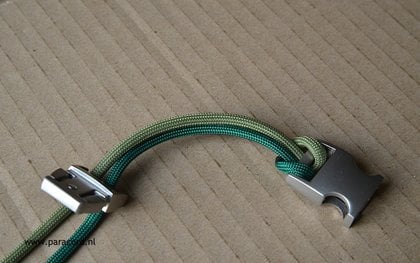
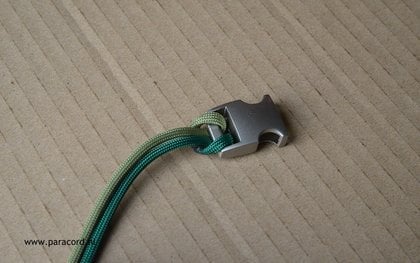
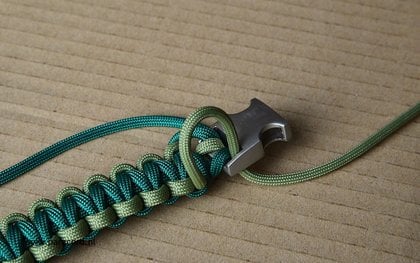
Step 3: Put the running tip through the top of the male and adjust the bracelet to the correct length.
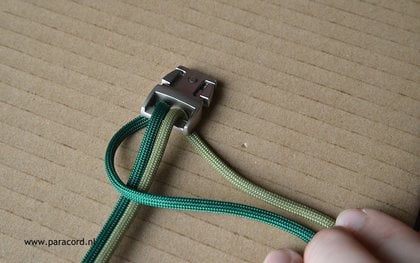
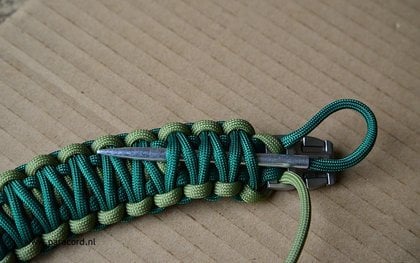
Step 4: Put the left cord over the the vertical cords. Ensure a loop is created on the left side.
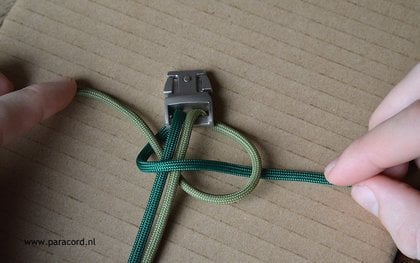
Step 5: Put the right cord over the horizontal cord. Bring the cord under the vertical cords and take it through the loop on the left side. Subsequently pull the horizontal cords.

Step 6: Put the right cord over the vertical cords. Ensure a loop is created on the right side.
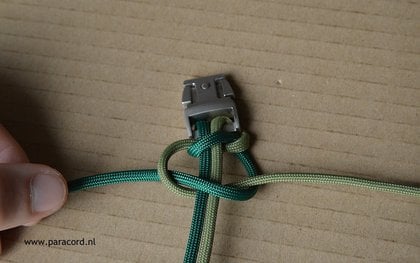
Step 7: Put the left cord over the horizontal cord. Bring the cord under the vertical cords and take it through the loop on the right side. Subsequently pull the horizontal cords.
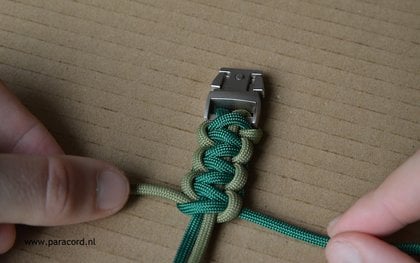
Step 8: Repeat steps 4 until 7.
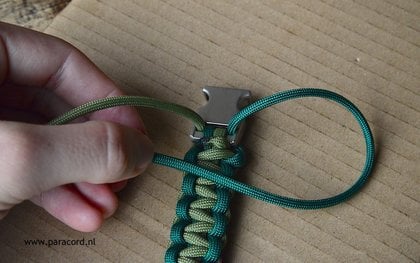
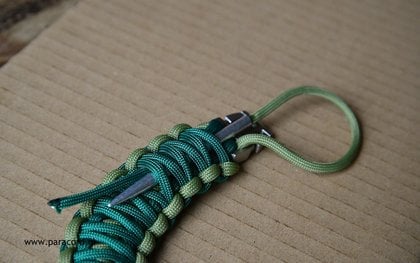
Step 9: Put the left cord on the left side through the top of the female.
Step 10: Put the right cord on the right side through the top of the female.
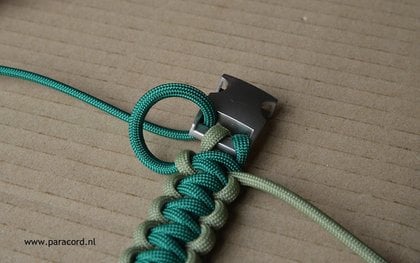
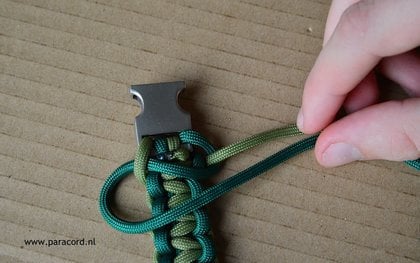
Step 11: Flip the bracelet so the melting point is visible. Put the right cord on top of the bracelet. Ensure a loop is created on the right side.
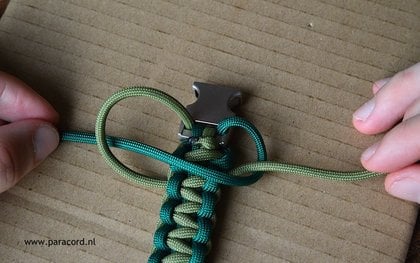
Step 12: Put the left cord on top of the horizontal cord. Bring the cord under the bracelet and put it through the loop on the right side.
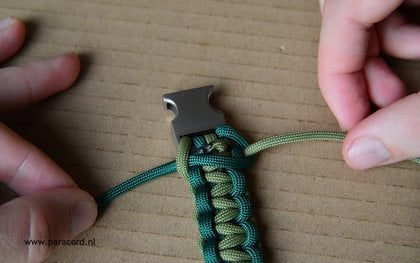
Step 13: Pull the horizontal cords.
Step 14: Put the left cord over the bracelet. Ensure a loop is created on the left side.
Step 15: Put the right cord over the horizontal cord. Bring the cord under the bracelet and put it through the loop on the left side.
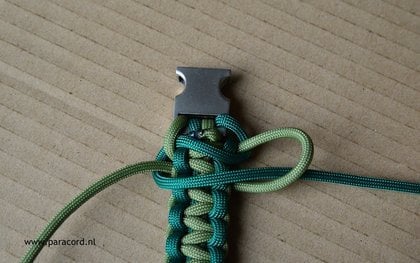
Step 16: Repeat steps 11 until 15. Ensure you tighten every knot equally. This way the end result will be the prettiest.
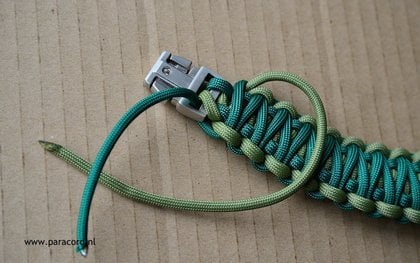
Step 17: Put the left cord on the left side through the bottom of the female.
Step 18: Put the right cord on the right side through the bottom of the female.
Step 19: Put the left cord under the horizontal knots for the finishing touch.
Step 20: Put the right cord under the horizontal know for the finishing touch.

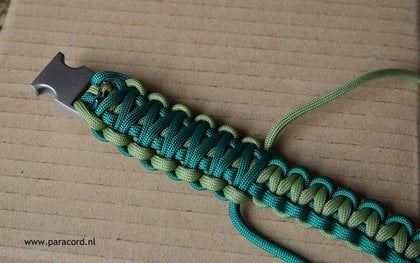
Step 21: Cut the cords tightly on the bracelet. Subsequently melt the end of the cords.
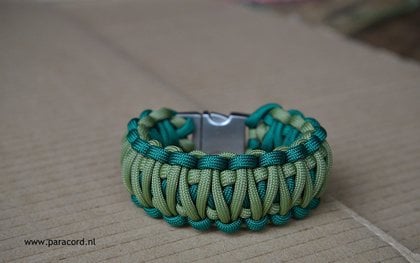
Step 22: Time for a cup of coffee! You are done!