


 Team Paracord.eu
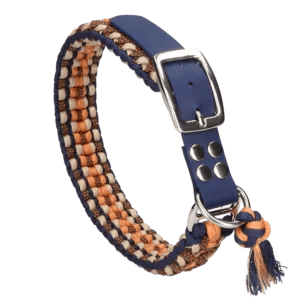
When making paracord collars it can be nice to use a BioThane adapter. This makes the collar adjustable in size. Here you see how to make such an adapter yourself.
An adapter is ideal to make your project adjustable. You see such a BioThane closure used especially with handmade dog collars, for example with knotted paracord collars.
What do you need for a BioThane adapter?
In this blog we assume that you will use rivets to attach the BioThane. Do you choose to use chicago screws? If so, it is best to choose 5 mm long screws for 2 layers of biothane.
For the adapter of 25 mm biothane, you can use these materials:
- 1x 22 cm of 25 mm BioThane
- 1x Tri Glide 25 mm
- 1x D-Ring 25 mm
- 1x Belt Buckle 25 mm
- 2x Double Cap Rivet 10 mm
Do you make an adapter with BioThane in a different width? Then, of course, adjust the size of the materials accordingly.
These are the tools we use for making the adapter:
- BioThane Adapter Template 25 mm
- Spindle press
- Hole Punch 3.5 mm
- Anvil
- Rivet Die Set 10 mm
- Scissors
- Pen or marker
To make the holes in the BioThane and fix the rivets, the spindle hand press is used here. Don't have a spindle press? You could also do this by hand with Ivan tools.
Cutting the ends
You can choose to cut the ends of the biothane at an angle, round or to just cut the corners. This is purely a matter of taste, so it will not affect the rest of the adapter.


Marking holes on the BioThane
To make your adapter as neat as possible, it's handy to first mark where the holes need to be in the BioThane. An adapter mould is an ideal tool for this, as it allows you to easily mark the right places without having to first measure where the holes should be.
In the picture below you can see the template. This also shows the area where you should fold the BioThane and where the accessories should be placed.
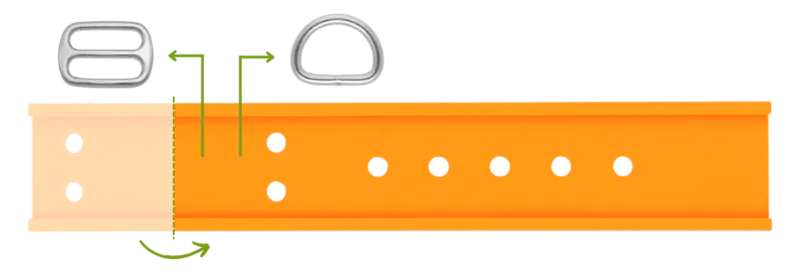
Take the piece of BioThane and place it in the mould. Make sure that the edges of the template and the BioThane are aligned. You will notice that the end of the BioThane is just outside the mould.
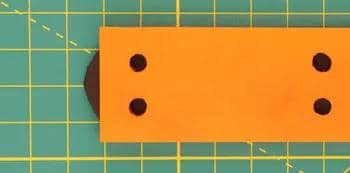
Now flip over the template with the biothane. Now make a small dot in the middle of each hole with your pen or marker, to mark where the actual holes should be. Try to make the dot as close to the middle as possible.

Punching holes in the BioThane
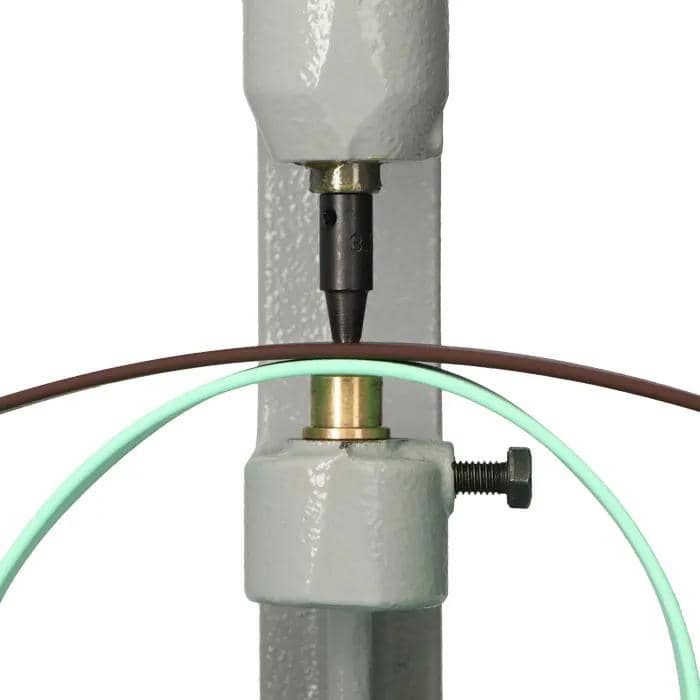
Now that you have marked the BioThane, you can start punching the holes. Here we use a spindle press, but as mentioned before you can also do this manually with Ivan tools.
With the spindle you can punch the holes in a quick and efficient way. Put an extra layer of BioThane or leather under the biothane of the adapter, so that the anvil and hole punch are damaged as little as possible.
Punch the holes in the place of the markings you have made on the BioThane.

There is also a special spindle template available. Here you use the template on the spindle itself. This makes it easy to punch the holes in a straight line.
Are the holes not neat enough? Then you can heat a paracord needle and hold it in the hole to melt away the remaining polyester. Caution: never use a direct heat source (such as a lighter) on BioThane. The substances that are emitted in this way are toxic.
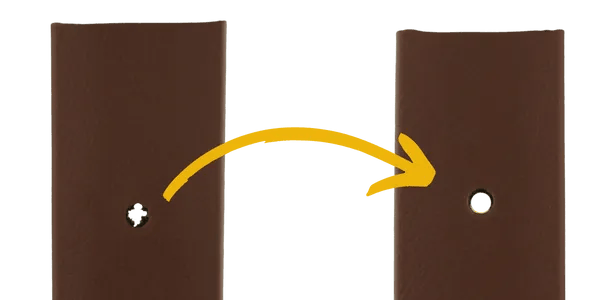
Adding accessories and joining BioThane
After you have punched all the holes, add the metal accessories. First slide the D-Ring and then the Tri-Glide over the BioThane.
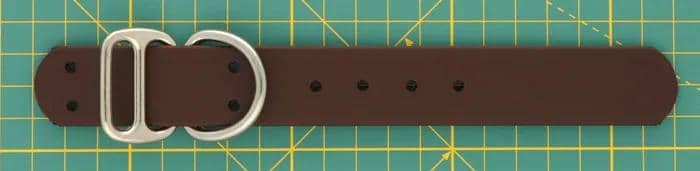
Now fold the shortest piece of BioThane in half so that the accessories are 'locked' in the biothane loop. Make sure that the holes that enclose the accessories are aligned. The rounded side of the D-Ring and the empty opening of the Tri-Glide are pointing outwards.
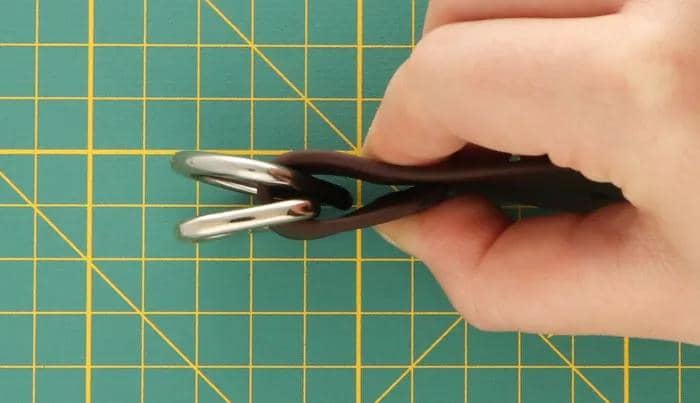
If you are working with chicago screws, it is now a matter of putting the female side through the holes, putting a drop of Loctite in it and then fixing the male side firmly on top.
In this example, we are using rivets with a 10 mm cap. We are securing these using the spindle press and the accompanying 10 mm rivet die set.
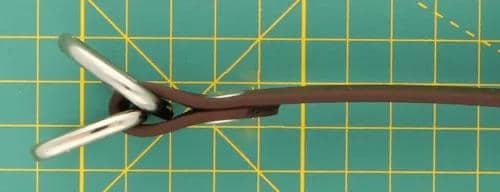
In this video you can see how to use the spindle hand press to fix the rivets.
Adding the belt buckle
Your adapter is now almost ready! The only thing left to do is adding the belt buckle.
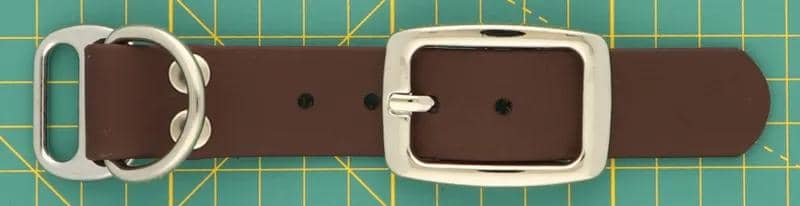
Not really your thing to make this yourself? Fortunately, the BioThane adapters are also available ready-made!
Related Articles
Knot the Cookies Pie | Tutorial
In this photo tutorial, you will see how to knot the Cookie’s Pie pattern. The Cookies Pie was designed by Silke Engels and is hard to make.
What kind of rope do I need for my horse?
Would you like to make your own horse accessories out of rope, such as a unique horse halter, but aren’t sure what you need? In this blog, we’ll give you advice on what kind of rope to use for different parts of your horse gear.
Make your own handsfree dog leash | DIY kit instructions
With our tutorial, you can easily make your own hands-free dog leash. With this 3-meter leash, you can walk your dog in peace while keeping your hands free! Isn’t that ideal? This way, you can take beautiful photos of nature or quickly send a message to a friend. In this blog, you'll find everything you need to follow our tutorial.
BioThane and Paracord Color Matching
To help you find the perfect paracord match for our BioThane colors, we have created this handy reference guide. All listed colors are available in Paracord Type III, with select colors also available in other paracord types. The most up-to-date version will always be available right here on this page.
Make the Niki's Butterfly knot | Tutorial
In this photo tutorial, you will see how to knot the Niki's Butterfly pattern. The Daylight knot was designed by Nicole Damer and is easy to make.
2 x Bag charm inspiration
We couldn’t resist the cute bag charm trend. Make your own leather bag charm with our kangaroo or nappa leather. Follow our tutorials and create your custom key ring bag charm!