

 Team Paracord.eu
Knot your own paracord dog collar with the Helmys Indianer knot. Here is how to make this knot by Helmy Stolwijk from a to z.
Have you purchased the Paracord DIY kit “Helmys Indianer - Make your own dog collar”? You’ll find the instructions for knotting this collar on this page. Of course you can also make this knot without this kit, you can find the necessary materials on the DIY kit’s product page.

These tools are useful to have on hand:
- Paracord needle Type III or a crochet hook
- Blowtorch
- Scissors
- Teaspoon (for finishing off)
- Paracord jig
- Paracord needle micro or crochet hook (only when adding beads)
This knot has been designed by Helmy Stolwijk. The kit and accompanying instructions were also made in collaboration with Helmy. Take a look at her website Paradoggies and follow Helmy on Facebook!
The beginning of the collar
When making a dog collar, the set-up is a very important part of the knotting. Obviously you don’t want your dog to get loose, so you need to make sure the set-up is safe.
Length of the collar
Before you can make this safe set-up, you must know how long it should be. The rule that you can follow with the products in this kit is: circumference of the dog's neck (in cm) - 7 cm.
Are you making the collar for a dog with a neck circumference of 43 cm? Then the length of your set-up should be 36 cm (43 cm - 7 cm). In the picture below you can see which part this is.

Please note that these are all average values. Lengths may vary due to personal knotting styles. With this length we assume that you close the adapter at the level of the middle hole. If the collar is too tight or too wide, you can easily change holes to make it fit.
You make the single set-up (Kosmetik 2.0) as shown in the video.
Join cords
To make this pattern in the collar, you have to fuse two colours together. You can do this by following the example below.
Please note that you should never use this technique for the set-up (colour 1 in this video). Make sure to always make the set-up out of 1 piece.
Knot the Helmys Indianer
When you bought this kit, you could choose to add beads. These beads are only added at the end, after knotting the collar. This is shown in the video.

Adding colours to the set-up
Add all the colours to the set-up, as shown in the video. Will you be adding beads at the end? Then you should add the micro cord together with colour 2 to the set-up.
You keep the micro cord aside during the knotting. You will only use it again when you are going to add the beads.
Start knotting
Now you’ve added all colours to the set-up, you are ready to start knotting. The video shows how to tie this knot. Repeat this knot until your collar has the desired length.
Finishing off the collar
The finishing off of this knot can be done according to the same principle as other knots with 4 colours. Watch the video below to see the finishing off for the Graf Wutz knot.
Adding beads to the collar
Now you can start adding beads to the collar. As said, this is optional, without beads the collar is also beautiful.
It is handy to use a paracord needle for micro cord. Alternatively you can use a small crochet hook.
Thread a bead onto the micro cord and pass the micro cord under colour 2. Repeat this until you have beaded the whole collar.
What to do with rope leftovers?
After tying your collar, you will probably have some rope left over. It is certainly not necessary to throw it away. You can use this rope for laces, bracelets, keycords, but also for keychains.
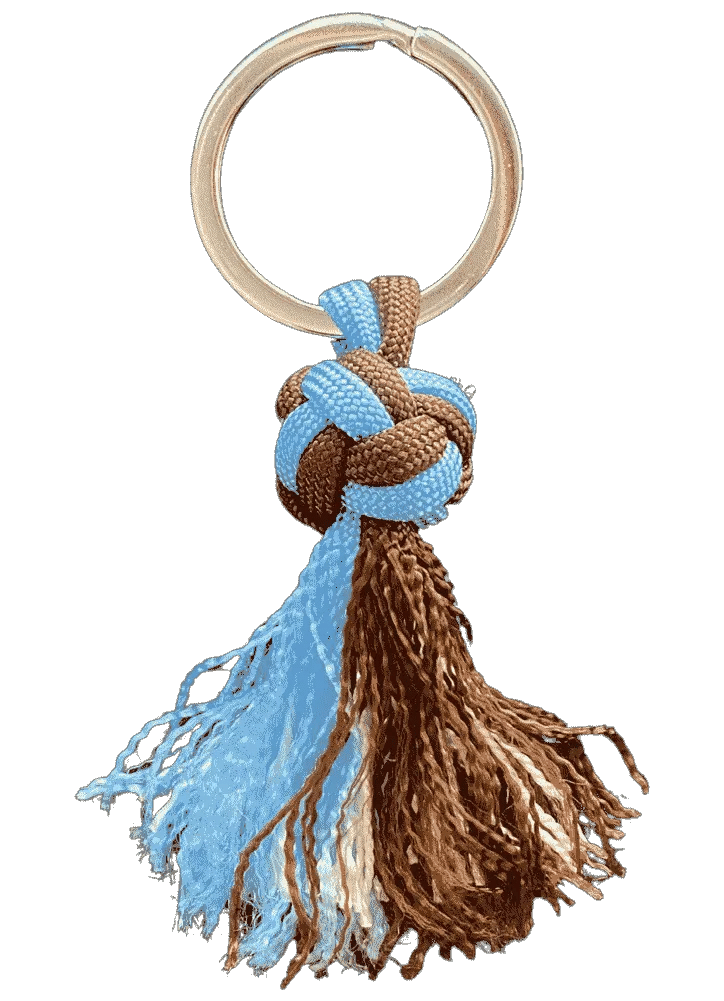
For example, you can make a keychain with the diamond knot. In the tutorial below, a diamond knot is used to start a dog leash, but it works exactly the same for a keychain. Imagine that the carabiner in the video is a key ring.
You can make the knot with as many strands as you like, because from 3 strands (or pairs) on, the principle remains the same.
After making the diamond knot you can add beads to the ends or fray the ends with for example a paracord needle. You could also choose to tie knots at the ends of the strands.
Tutorial Diamond Knot
Related Articles
Which Paracord Colours Actually Glow Under Blacklight?
Not every neon paracord colour reacts to a blacklight or is glow in the dark, despite what most people assume. Neon just means the colour is bright. Whether it actually glows in the dark or under UV light comes down to the dye used, and only a handful of our colours are made with that specific fluorescent or phosphorescent dye.
Make your own handsfree dog leash | DIY kit instructions
With our tutorial, you can easily make your own hands-free dog leash. With this 3-meter leash, you can walk your dog in peace while keeping your hands free! Isn’t that ideal? This way, you can take beautiful photos of nature or quickly send a message to a friend. In this blog, you'll find everything you need to follow our tutorial.
Make the Niki's Butterfly knot | Tutorial
In this photo tutorial, you will see how to knot the Niki's Butterfly pattern. The Daylight knot was designed by Nicole Damer and is easy to make.
2 x Bag charm inspiration
We couldn’t resist the cute bag charm trend. Make your own leather bag charm with our kangaroo or nappa leather. Follow our tutorials and create your custom key ring bag charm!
Make the Daylight knot | Tutorial
In this photo tutorial, you will see how to knot the Daylight pattern. The Daylight knot was designed by Silke Engels and is of an intermediate level.
Make the Cambio knot | Tutorial
In this photo tutorial, you will see how to knot the Cambio pattern. The Cambio knot was designed by Annet Eul and is of an intermediate level.